How Youtube's Ambient Mode Works
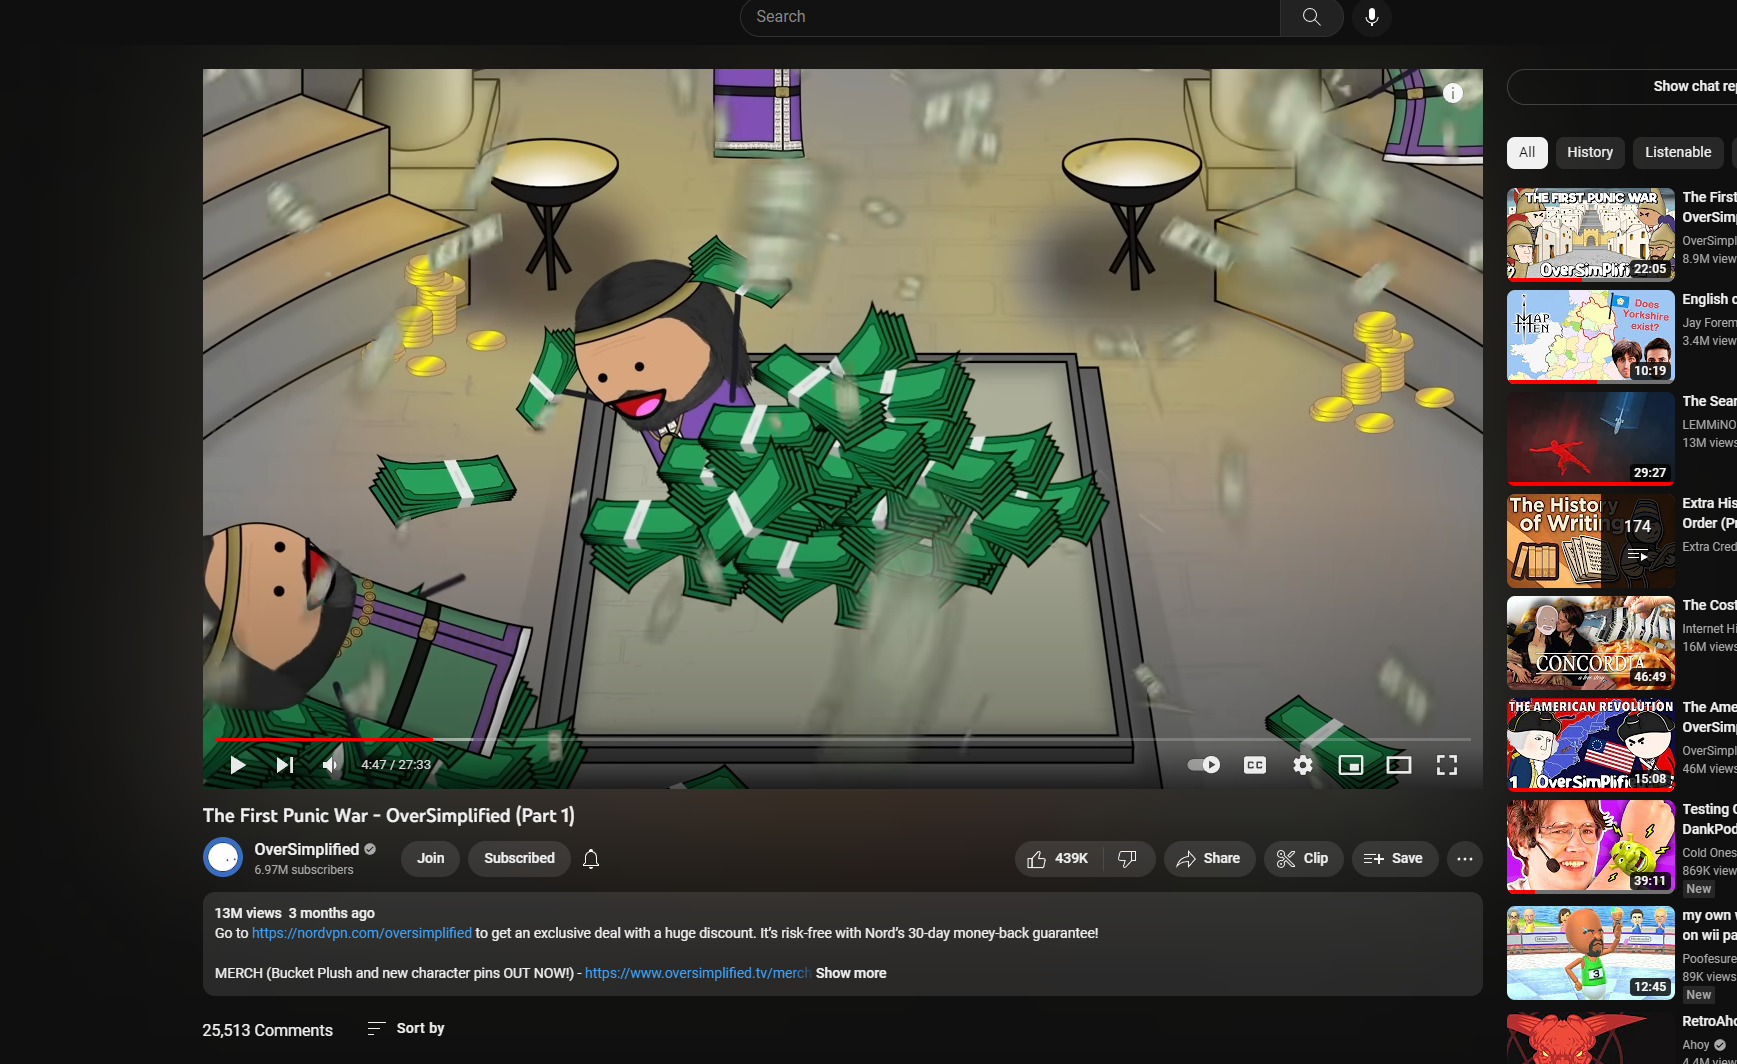
Youtube has recently rolled out a new feature called Ambient Mode which adds a glow effect around the video you’re currently watching similar to a TV backlight sync box. It’s currently only available for dark mode users. We'll be looking at how this feature works.

It’s available at the flick of a switch in the Settings menu and before long the glow effect creeps into the video after a little bit of time has passed. It’s a nice little effect that immerses you in the video you’re watching a little bit more and even syncs the colour of the ambience to the edge of the video.
So how does this work? I initially had 2 theories:
- Live-sampling of the video edges to provide the correct colour?
- A generated colour sequence for the video that is synced to the playback time?
The truth is actually quite a lot simpler and more elegant than that.
How it Actually Works
When observing the glow effect using a colourful video, it seems that the background only changes between two colours:
By making the video player (<div id=player-container-outer>) element transparent with (opacity: 0), we can see the ambient mode is simply a kind of blur effect behind the video itself. The actual ambient effect is under the <div id=cinematics> container where there are 2 canvas elements. By observing the computed properties for each of these in Chrome Devtools, you can see that the opacity changes from 0 to 1, which suggests that the blur effects are “crossfaded” between two states.
Now the question is, what is getting crossfaded between the two states? To answer this, we can get some clues from Chrome’s Network Tab. We can see that if the ambient mode is turned on, an image is downloaded periodically and follows the naming convention of MX.webp (M0.webp, M1.webp and so on).

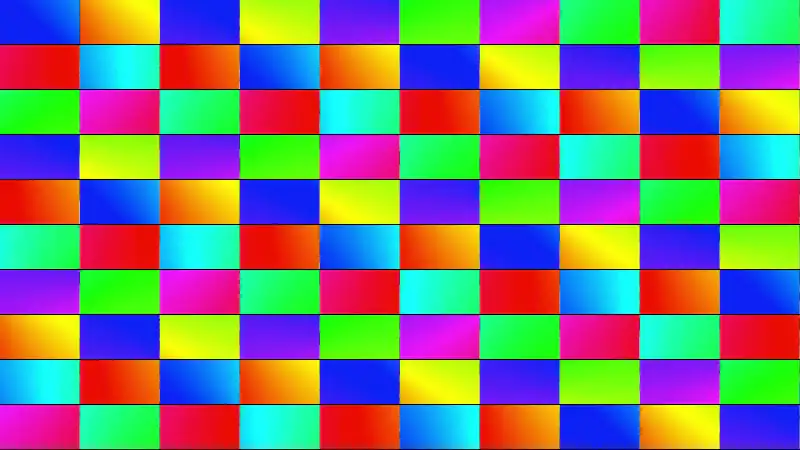
That image turns out to be a grid of 10 x 10 periodic frame captures for the video, taken at a set interval for a total of 100 captures:

Each image is fairly low res (80 x 45 pixels). By simply observing the mosaic, we can see that this is the image that is used to get a glow effect! We can hypothesise the process below on the client-side to achieve the ambient effect:
- The image is heavily blurred so only the colour information is retained
- The image is placed behind the video and scaled up (by
transform: scale(1.5, 2)) so that the blurred image appears at the edge of the screen - The image is crossfaded to the next image in the grid
The only pre-processing needed for each video is simply to produce the mosaics and everything else is done on the client-side. It also gets the colour information solely by enlarging and blurring said image and crossfades between the two, which is simple and effective. Cool!
Ambient Mode Parameters
After some more digging, I stumbled upon the parameters on the client-side code that controls this, which is in desktop_polymer.js. The code is slightly obfuscated, but we’re still able to make out the main object that deals with the ambient mode. There is a cinematicContainerRenderer object which contains various configurations related to the container renderer and the ambient animation, which can be found being initialized with data from a script at the bottom of the DOM tree in ytInitialData. The cinematicContainerRenderer object is given below:
a.cinematicContainerRenderer = {
  presentationStyle: "CINEMATIC_CONTAINER_PRESENTATION_STYLE_DYNAMIC_BLURRED",
  config: {
    animationConfig: {
      minImageUpdateIntervalMs: 2e3,
      crossfadeDurationMs: 2e3,
      crossfadeStartOffset: 1,
      maxFrameRate: 30,
    },
    colorSourceSizeMultiplier: 1.4,
    applyClientImageBlur: !0,
    colorSourceWidthMultiplier: 1,
    colorSourceHeightMultiplier: 2,
    blurStrength: 2.5,
  },
};
We can infer most of the behaviour of the properties of the objects by the name alone, but where’s the fun in that? To be able to play around with these values, we can modify the values in desktop_polymer.js by using a feature in Chrome Devtools called Local Overrides. With this feature, we’re able to replace the script on Youtube with whatever modified version we have on our local machine.
Using this, let’s play around with some values.
blurStrength
Reducing the blurStrength to 0 confirms our theory that we’re only using the image as the source. The term that’s used in the code here is the colorSource. Reducing the blurStrength to 0 shows that the image is purely the colour source of the glow effect.
colorSourceHeightMultiplier, colorSourceWidthMultiplier & colorSourceSizeMultiplier
Changing these values changes the size of the colour source image.
From the code, the colorSourceSizeMultiplier is used a fallback value in case the width and height value is not available. My guess is that different size might not have the width and height multiplier, as it seems that it’s being used when its a square.
(Mic = function (a) {
  var b;
  return null !=
    (b = a.cinematicContainerRenderer.config.colorSourceWidthMultiplier)
    ? b
    : a.cinematicContainerRenderer.config.colorSourceSizeMultiplier;
}),
(Nic = function (a) {
    var b;
    return null !=
      (b = a.cinematicContainerRenderer.config.colorSourceHeightMultiplier)
      ? b
      : a.cinematicContainerRenderer.config.colorSourceSizeMultiplier;
});
minImageUpdateIntervalMs
This is the smallest amount of time before an image starts to crossfade to a new image. Think of this as the “cooldown” on changing to the next image.
crossfadeDurationMs
This changes the time it takes to crossfade between the two images in ms. In the video below, I’ve changed this to 50 ms which makes it change almost instantly:
This makes it very obvious that the image is changed earlier before the sampled frame appears to allow the glow effect to transition from the old image to the new image smoothly.
crossfadeStartOffset
This acts as a sort of multiplier on the length of transition. Changing the value to 2 would make the crossfade transition 2x longer.
Other Observations
Below are also some interesting notes but did not warrant its own section:
- You may have noticed
presentationStyle,maxFrameRateandapplyClientImageBlurwasn’t tested. This was because it seemed to not be used indesktop_polymer.jsand I couldn’t find where else it might have been used. - Even short videos have an ambient mode (although the ambient modes for those video don’t work), but some videos simply don’t have an ambient mode for some reason (some older videos even have the ambient mode!)
- In the example video, we were using a very long video. The mosaic for the video was sampled at a rate of 10 seconds/frame. However, this does not mean that any video less than 16.67 minutes (10 seconds/frame x 10 frame/period = 1000 seconds/period = 16.67 minutes) will have only 1 mosaic. I've noticed that for shorter videos, it can go up to 1 second per screenshot, although the rate of change for those videos still seem to maintain a slow transition time between states as I imagine a quick transition would be distracting.
- When seeking through the video or turning the ambient mode, it also seems to download the mosaics for the entire length of the video, although instead of a 10x10 grid, it’ll be a 5x5 grid.
Future Explorations
The logic for the changing of the images in the mosaic is actually in desktop_polymer.js. It’d be an interesting thing to read next and just from skimming the logic it seems that there’s a storyboard manager that publishes the event and event listeners that subscribe to the event to trigger the crossfade between the frames.
Copyright © 2025 | Che Adam Rashid